snowman multi-media art

Pin It We spent a cold-winter's afternoon making our rendition of a snowman, using multi-media. Originally inspired by Deep Space Sparkle, this is a great way to have the kids use different forms of media to create one thing. And, it makes for beautiful art to display this time of year... even if you can't go out and make a real one.
Steps:

Using thick paper, paint your "landscape" in layers... then set aside to dry, and return to it later {or use a blowdryer if you're impatient like us :) }

Untitled

Trace and cut three different sizes of circles....

Untitled

Dig into your box of fabrics, buttons, yarn - whatever you have on hand to start to repurpose as the snowman's face and clothes.

Untitled


Untitled

Hang to dry and display your winter scene! {From left: Noah, Ava and Me!}

Untitled

recycling crayons

Pin It Sharpening crayons and then glueing them on paper has always been one of my favorite art projects to do as a kid. A&N did a few when they were little. And since then I've been collecting a bin of damaged crayons. This week, I tried to do something different, and follow some of the pinterest ideas floating around.... like recycling the crayons into a different mold so that they are new again!

Start by peeling all of your crayons and then breaking them into pieces. This is a lengthy process.  Whether its Crayola, RoseArt, or the ones from restaurants (yes we bring ours home!), each one is glued on differently - and it took a lot of patience and nail digging to get them naked. 


Untitled

Drop various colors into each mold and fill to the top and bake at 350 for about 10 mins.

Untitled

Silicone molds are great for these - especially afterwards when you need to "pop" them out.

Untitled

The mosaic colors look beautiful and are fun too look at.

Untitled

And even more fun to color with because you won't know what color you'll get!

Untitled

3 techniques, 2 days, 1 mr. seahorse

Pin It Inspired by this assignment from Deep Space Sparkle - a fantastic art blog - we set out to produce artwork like the great Eric Carle too. I thought this would be a fun project to try on this summer day - because A&N love Mr. Seahorse and it brings back memories of our beach trip.  The layers, techniques, and two-day process was part of the beauty of this art project. Most of the time when kids do "art" they have an idea in mind. Here, they discovered how "art" itself can be pieced together - to make even bigger art.

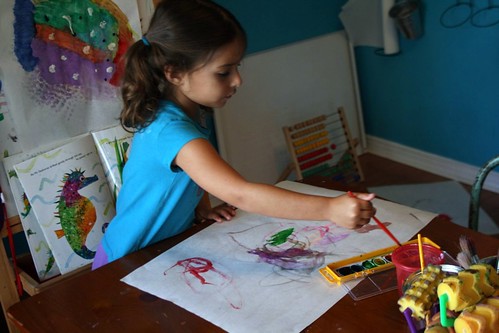
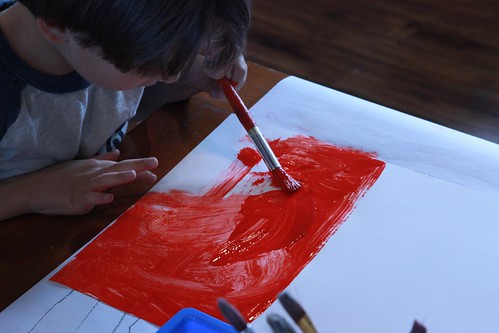
First step - Mr. Seahorse {Tempera Paint}
On plain white butcher paper, or what ever you have on hand, create colorful textures with tempera paint and using different brushes and strokes to fill the page.

Mr. Seahorse

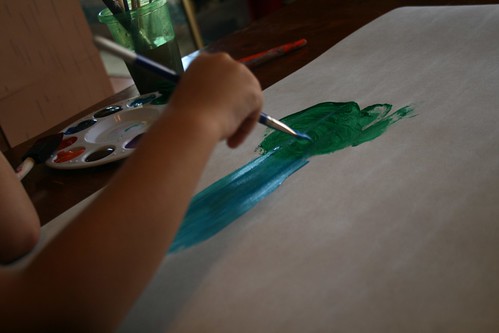
Colors should bleed together.
Mr. Seahorse

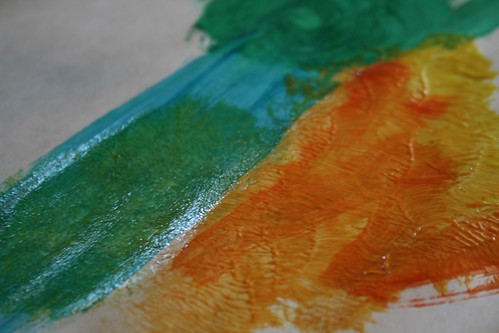
Try sponges, rollers, big and small brushes. "Water-down" your colors so that they blend and bleed together - covering all of the white underneath.

Mr. Seahorse

While Noah's art was still wet, he sprinkled white glitter on top. You could also coat the sheet with clear-drying glue and apply glitter or crayon-shavings for fun.

Mr. Seahorse

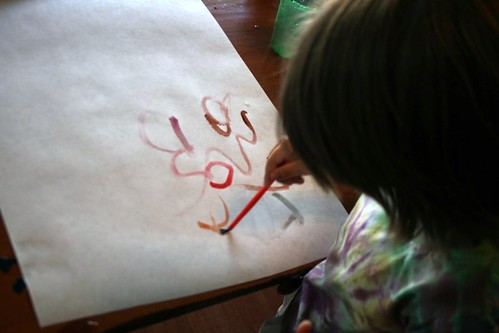
Second Step - the Sea {Watercolors}
Use a large sheet of white paper, or butcher paper, to create the background. Water colors {which we haven't used in a long time} was fun for the kids - as the application and results are entirely different. Set both sheets aside to dry.

Mr. Seahorse

Mr. Seahorse

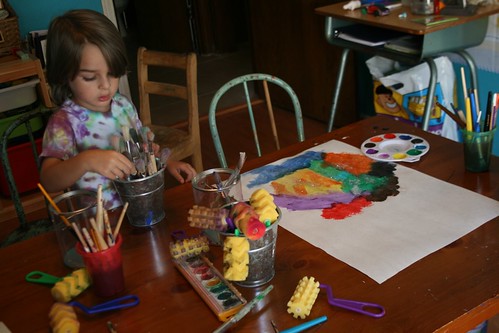
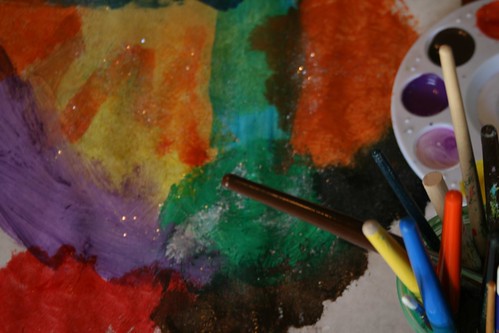
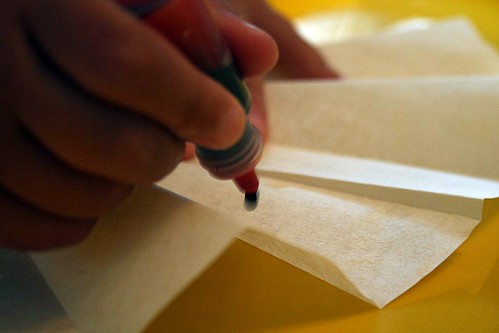
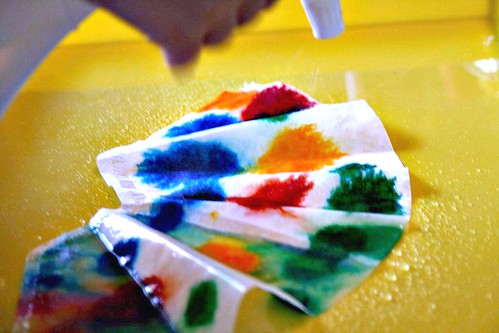
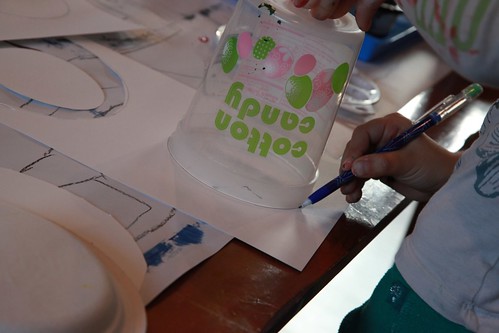
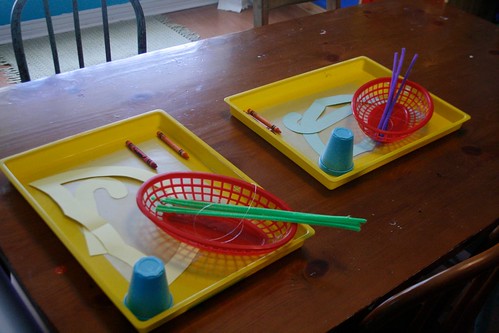
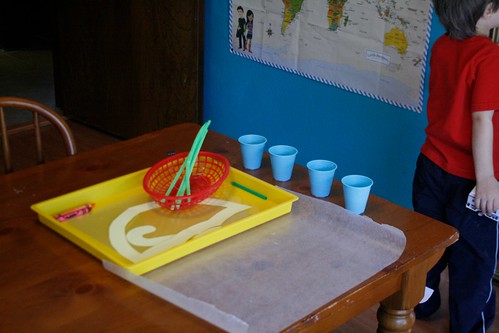
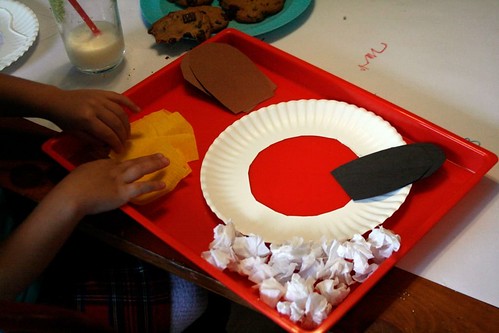
Third Step - Coral reef {food coloring}
This was something new for even me to try. Use what you have at home to add another dimensional art piece. We used coffee filters and food coloring. Our filters are the pocket kind, so I opened these up and folded it accordion style. Then the kids squirted drops of food color on the filter.

Mr. Seahorse

Making unique patterns with the 4 colors.

Mr. Seahorse

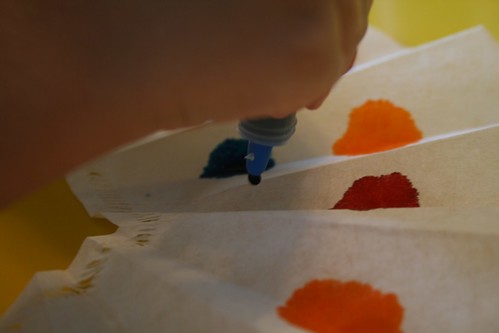
Use a water bottle and spray away!

Mr. Seahorse

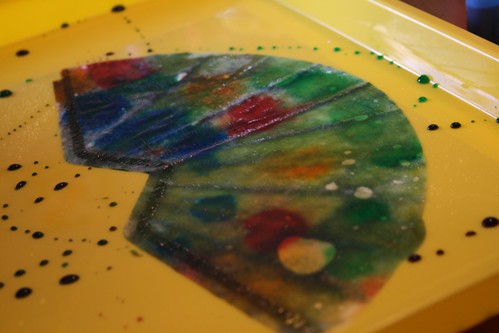
You'll have to jiggle the tray a bit to blend the colors. Set outside to dry.
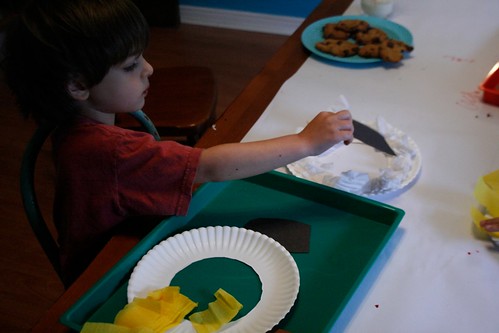
Mr. Seahorse


Day Two!
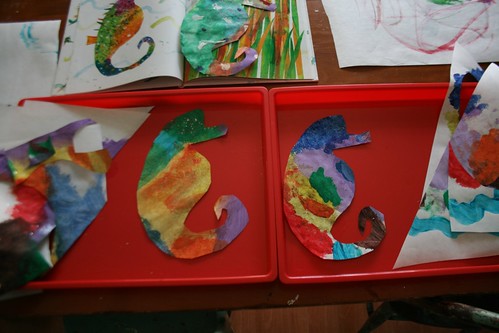
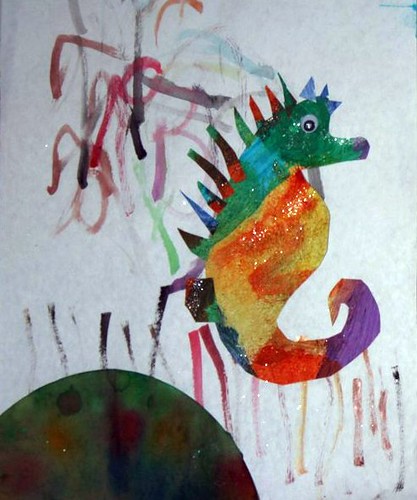
If you have the book Mr. Seahorse, trace him directly from there or try this link for the template. Cut out a "seahorse" from the middle of the painted paper the kids made from Day One.

Mr. Seahorse

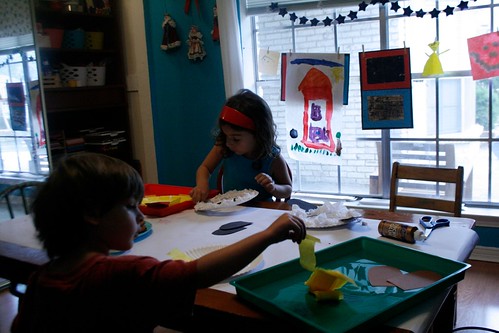
First Step: Setting the Scene
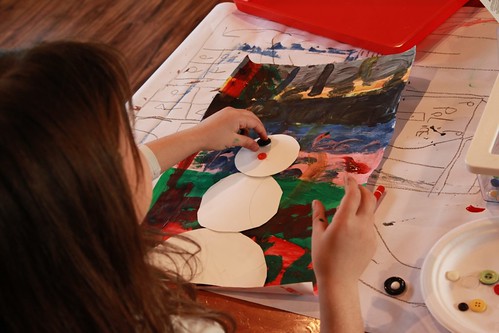
We began with the water-colored sheet - and I described how what they created resembles the reeds - like in the book. They glued their dyed filter or "reef" and the unfinished seahorse to set the scene for Mr. Seahorse.

Mr. Seahorse

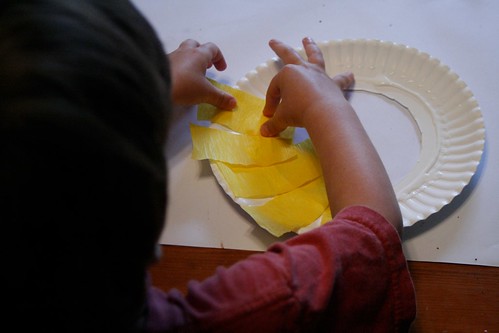
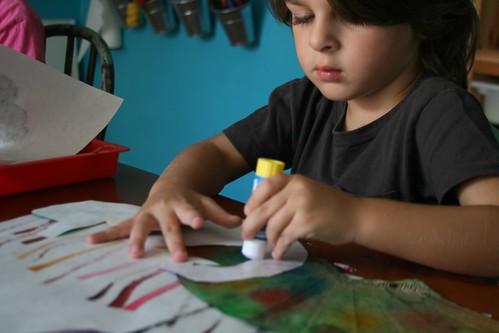
Second Step: Finish Mr. Seahorse
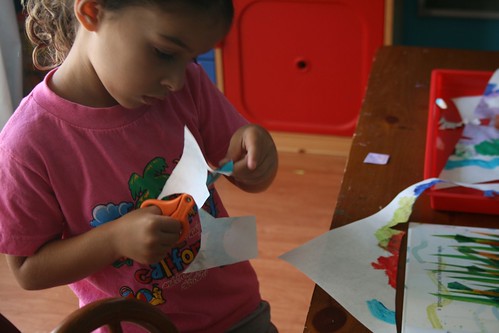
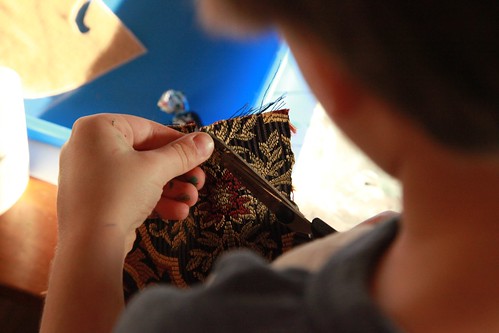
Using the painted paper left overs, the kids practiced using their scissors and cut out a "fin" and "spikes" and then glued them on.

Mr. Seahorse

Mr. Seahorse

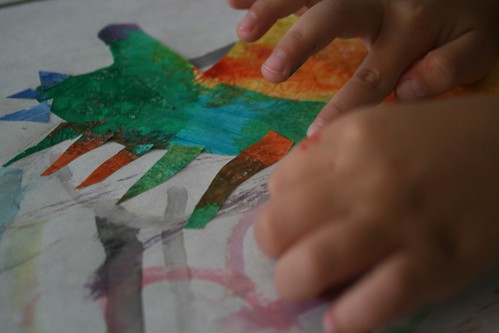
A googly-eye later... and ta-da!

Mr. Seahorse

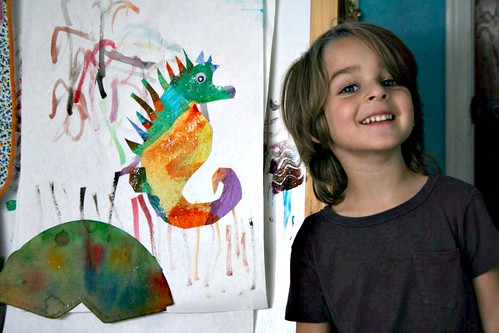
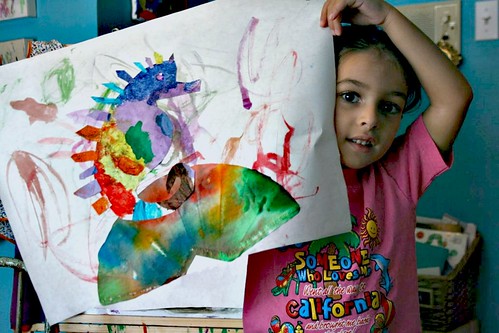
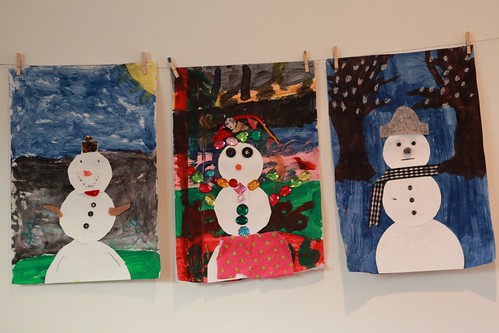
Final Step: Proud Art-work Presentations

Mr. Seahorse

Mr. Seahorse

vintage carnival party invitations

Pin It
We finally decided on a theme for Noah's 4th Birthday - thanks to some cute vintage stuff I found at the craft store a few weeks ago. Plus, so much of it can be hand made, from games to decorations - and right now, I heart everything vintage...

I created these in PhotoShop using fun "carnival" style fonts - and colors red, gray and blue. My procrastination in getting the invites done were thanks to my fruitless attempts of finding red and white baker's twine at my local craft stores {who knew?} Etsy vendors carry a slew of these in small quantities and colors, but I didn't want to pay for shipping. More empty handed shopping trips followed, so I buckled down and ordered a giant spool online from We Sell Coffee - 3,400 yards to be exact {seems like the best value with shipping}. It finally arrived today, so we got to work... {I mean, this was our art project for the day}...

Vintage Carnival Invitations

Vintage Carnival Invitations

After I trimmed the edges with scalloped scissors, Noah pasted glue on the invite and adhered it to red card stock {8.5 x 11 cut in half}. Then he placed tiny colorful fasteners to the top.

Vintage Carnival Invitations

Ava was in charge of cutting strands of string to lace around the fasteners...

Vintage Carnival Invitations

I cut out triangle-shaped pieces out of origami paper {already had in the kids' art supplies}. Ava coordinated groups of 4 "flags" to go onto each card as the bunting... which I stuck on over the twine using double-sided foam tape...

Vintage Carnival Invitations

This is how they turned out... in the grand scheme of things, I probably could have used any kind of string to create this effect, but for some reason, I had my mind fixed that it had to be red and white... oh well. So they are 2 weeks behind delivery...
Vintage Carnival Invitations


Vintage Carnival Invitations

Now, what to do with the rest of the 3,398 yards of twine?...

umbrella art

Pin It
This is a fun project to go along with a "rain" theme. And for the simple fact that the kids get to blow bubbles to make the "colorful" rainy look. It helps to cut out the craft supplies and prepare the bubble-syrup before hand and then pull out the tray when there's rain in the forecast. I used a smaller tray to contain a separate activity {pipe cleaners for making the Itsy Bitsy spider}.

Time: 30 minutes to prep. Project itself takes less than 5 minutes. Umbrella assembly after wards {2 days later} another 10 minutes.

Umbrella Supplies {per child}: Wax paper {to protect work surface}. 4 disposable cups. An "umbrella" top and handle using card stock. 2 transparent sheets {or report covers cut and separated}. Corn syrup, water, food coloring, dishwashing liquid and straw.

Craft Trays

On the day of the "rainy-day" event, place a sheet of wax paper to cover your work surface {and so that the project will "peel-off" easily when its dry}.

Umbrellas

For the mixing solution, combine 2 tablespoons light corn syrup, a half teaspoon water, few drops of food coloring and dishwashing soap in each cup. Place one of the transparent sheets over the wax paper and have the kids blow into each colored mixing solution with a straw...

Umbrellas

Umbrellas

Umbrellas

The bubbles will linger for awhile {because of the sticky concoction}, but the kids popped theirs with their straw. Remove the entire project {with wax paper} onto the tray or another area where it can dry for a few days. 

Afterwards, cover the dried colorful swirly-design with the second transparent sheet and press tightly. It'll stick together because the "art" is still gooey. Peel the two sheets off the wax paper and set aside. Dispose the wax paper. Place your cut-out umbrella top over the dry transparent sheets and cut off the access. Use tape to hold in place and add the handle. 

Here's what they look like...

Umbrellas

And here's a close-up of their  bubbly umbrella art!
Umbrellas

lambs... and lions... oh my!

Pin It
In trying to manage crafts, especially quick ones like these, I have started using "trays" to organize the materials the kids would need to craft a particular project. This avoids having to shuffle through the art supply drawers and shelves (because we have them stashed everywhere). For this project, taken from one of our craft books, the kids made lamb and lion masks. 

Takes less then 10 minutes.
Supplies needed per child: Strips of yellow crepe paper, crumbled white tissue paper, ears cut out from a sheet of brown and black construction paper (or foam paper), 2 paper plates with inner circle cut out, glue, and scissors.

lambs-lions

lambs-lions

lambs-lions

For the lamb, have the kids glue the white pieces of tissue paper around the plate. Add black ears to the top.

For the lion, have the kids glue strips of the yellow crepe paper to look like wild hair. Add the brown ears to the top. 

lambs-lions

When they are finished, glue each mask (back to back) to each other so that the kids can "flip" between animals...

lambs-lions

As you can tell, we had a lot of fun with this!

leprechaun's pot of "gold" - goody bag

Pin It
In search of celebrating St. Patrick's Day with the kids, I decided to do a treasure hunt - and needed to make something to stash their candy in. After reading One Minute Crafts {I forgot to watch the video, but the instructions are good enough} here's how they turned out:

paddy day hunt


First of all, use what you have. Whether that's black construction paper - or fabric from another project... {It just happened to be my lucky day in finding black and green felt in the craft shelf, in tact and unused}.

I folded the sheet of felt in half so that I'd have a closed bottom, and sturdier hold.

The glue as instructed on One Minute Crafts didn't work out too well. If you are in a hurry {like I was trying to get this done, filled, and hidden before the kids woke up}, do a quick whip stitch around the sides. 

There's a one-minute video on how to make four-leaf clovers. It's a little tricky doing this with felt, but use a pair of good scissors and it'll work. Since I needed 2, I cut one 8.5 x 11 sheet of green felt in half before starting the folds so that I would have 2 sets of clovers.

I had gold pipe cleaners I was going to initially use for the handle, but then I came across a spool of rainbow yarn, and opted for the softer and colorful "rainbow." But either will work. One thing I love about the yarn is that Noah ended up wearing his bag around his neck all day since he had to ration out his candy! 

In all - this was definitely not a "one-minute" craft -but very fun to make - plus the kids can use this bag over again...